
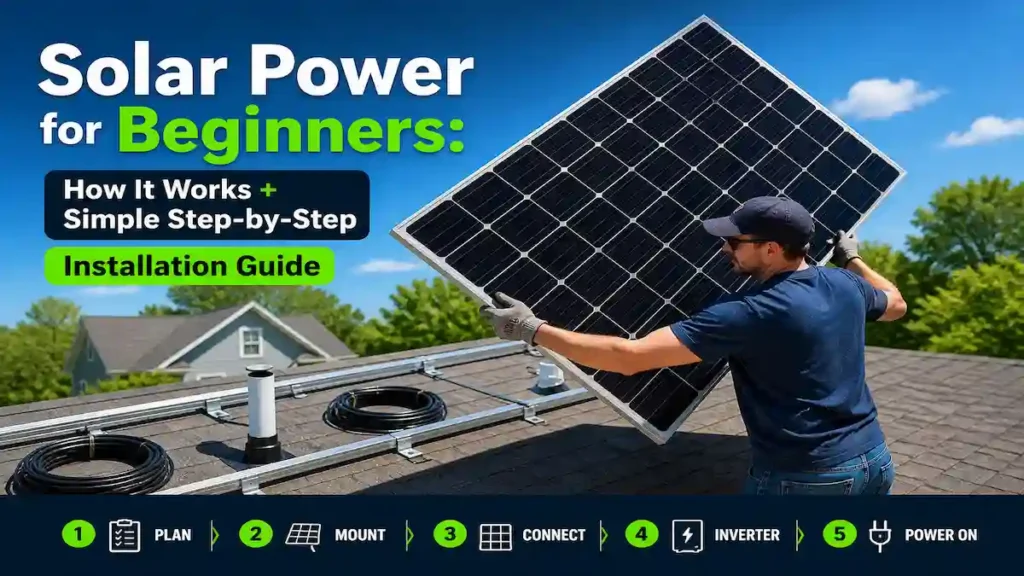
Solar power for beginners starts with understanding how sunlight is converted into usable electricity that can power your home, reduce electricity bills, and gives you a little more control over where your energy comes from. The basics? Solar panels grab sunlight, turn it into electricity, and you use that energy for your appliances—or you can stash it in a battery for later.
This Top Solar Picks guide walks you through the basics: how solar power actually works, what parts you need as a beginner, and a straightforward step-by-step look at installing a simple system safely at home.
This guide on Solar power for beginners was last updated by John Tanko on May 2, 2026, to ensure accurate and up-to-date information for homeowners, farmers, and off-grid users.
| Topic | What You’ll Learn |
|---|---|
| What solar power is | Simple explanation of how sunlight becomes electricity |
| How solar energy works | Basic flow from panels → inverter → home use |
| Main system components | Panels, inverter, battery, and basic setup parts |
| Beginner setup guide | Simple step-by-step overview of installation process |
| Cost & requirements | What beginners should expect before starting |
| Safety & mistakes to avoid | Common errors and how to prevent them |
This guide keeps everything simple so beginners don’t get lost in tech jargon. Solar power doesn’t have to be confusing—just take it step by step.
What Solar Power Is
Solar power means making electricity from sunlight. When sunlight hits your solar panels, the system turns it into energy you can use for your home, charge batteries, or even feed back into the grid. For newbies, the main thing to remember is it’s just another way to make electricity—clean, renewable, and available pretty much any sunny day. Learn more about the advantages and disadvantages of solar energy before making a decision.
How Solar Power Works
Here’s the chain: panels catch sunlight and make direct current (DC) electricity. That runs through an inverter, which flips it into alternating current (AC)—that’s what your home uses. Then the electricity gets used right away, stored in a battery, or sent into your home’s wiring. This basic flow is the foundation of any system, including a full off-grid solar system setup.
Once you get this basic flow, solar power isn’t nearly as complicated as it seems.
What You Need to Start
When you’re new to solar, don’t make it harder than it has to be. A starter system just uses a handful of key parts:
- Solar panels to catch sunlight
- An inverter to switch power for your home
- A charge controller to keep energy flowing smoothly
- A battery (if you want to store extra power)
- Some mounting gear and wiring
That’s basically everything you need. More advanced setups just add stuff to boost efficiency or handle bigger needs—the core system stays the same. choosing the right inverter and controller is important, especially when comparing MPPT vs PWM charge controllers and selecting a reliable solar inverter for home use.
Easy Installation Overview
Putting in a basic solar setup isn’t about making it fancy; it’s about getting the important pieces right. First, set up panels where they’ll get the most sun. Secure them to your roof or on the ground. Connect the panels to your inverter with proper wiring. If you’re using a battery, hook that in to catch extra energy. Once everything’s wired up, test it to make sure the power runs smoothly.
At this point, you’re aiming for a solid, safe system that actually works—not absolute perfection. System size depends on your daily energy usage, which is why understanding how many solar panels are needed to power a house is important before installation.
How to Install Solar Panels Yourself: Step-by-Step Beginner Guide
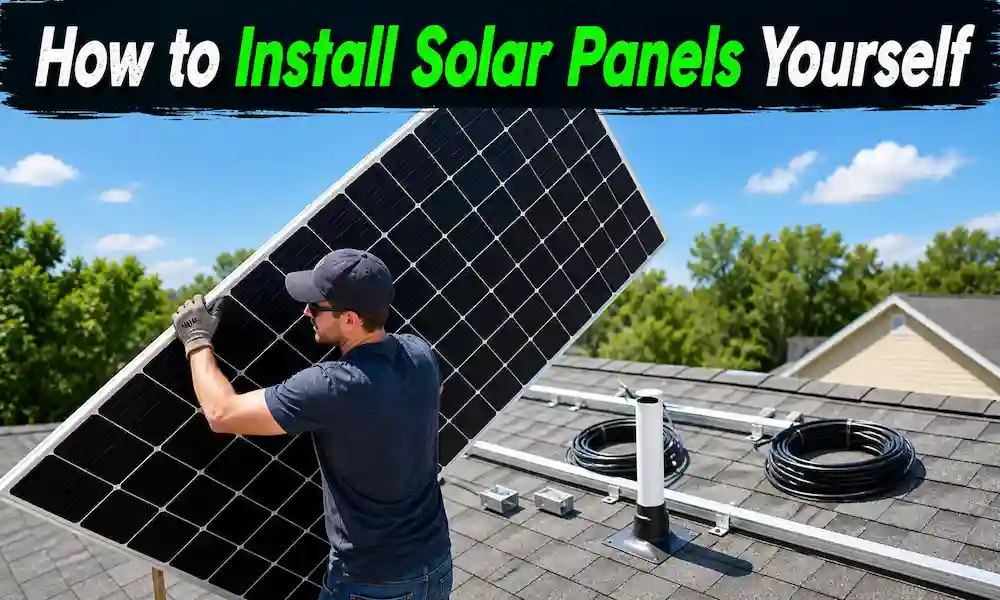
Installing solar panels yourself may sound technical, but the process becomes much easier once you understand the basics. With the right equipment, proper planning, and a clear step-by-step approach, beginners can set up a simple solar system for home use without confusion.
In this guide, you’ll learn how to install solar panels yourself in a safe and structured way—from choosing the right location and mounting the panels to connecting the system and getting everything running properly.
Step 1: Understanding How Solar Panels Work
Before installing a solar panel system, it’s crucial to understand how it functions. A solar power system consists of the following key components:
- Solar panels – Capture sunlight and convert it into electricity.
- Charge controller – Regulates power flow to prevent overcharging and battery damage.
- Solar battery (optional) – Stores excess energy for use at night or during cloudy days.
- Solar and power inverter – Converts DC power from solar panels into AC power used by household appliances.
- Mounting hardware – Holds the solar panels securely in place on a roof or ground-mounted structure.
A well-planned solar system can power your home, business, or outdoor spaces like solar fence lights or solar streetlights.
Step 2: Calculating Your Energy Needs
Before purchasing your solar panel system, you need to determine how much energy you use daily. Follow these steps:
- Analyze Your Electricity Bill – Look for your average monthly energy consumption in kilowatt-hours (kWh).
- Calculate Daily Energy Consumption – Divide your monthly kWh usage by 30 to get your average daily consumption.
- Estimate Solar Panel Output – A typical solar panel produces 250–400 watts per hour under direct sunlight.
- Determine the Number of Panels Needed – Divide your daily energy usage by the expected daily output of a single solar panel.
For instance, if your home uses 30 kWh daily and each solar panel produces 350W per hour, you would need approximately 10–12 panels for an off-grid setup.
Consider seasonal variations in sunlight and add extra panels if necessary.
Step 3: Choosing the Right Solar Equipment
The efficiency of your solar system depends on the quality of components you select. Here’s what you need:
- Solar Panels – Choose monocrystalline panels for higher efficiency and durability.
- Solar Battery – If you need backup power, opt for a solar or battery system with lithium-ion technology, which lasts longer than lead-acid batteries.
- Solar and Power Inverter – A pure sine wave inverter is the best choice for running household appliances smoothly.
- Charge Controller – An MPPT charge controller is more efficient than a PWM controller, ensuring maximum energy harvesting from your panels.
- Mounting Hardware – Choose between roof-mounting (space-saving) or ground-mounting (easier maintenance and optimal sun exposure).
Step 4: Installing the Solar Panels
1. Choose the Best Location
Select a spot with maximum sun exposure, typically a south-facing area in the Northern Hemisphere or north-facing in the Southern Hemisphere.
Avoid obstructions like trees, chimneys, or other buildings that may cast shadows.
2. Mount the Solar Panels
For roof installations, secure mounting brackets using stainless steel bolts and weatherproof the area to prevent leaks.
For ground installations, build a sturdy frame using tilt-angle solar racks to optimize sun absorption throughout the year.
3. Wiring the Solar Panels
- Series Connection – Increases voltage, ideal for minimizing energy loss over long cable runs.
- Parallel Connection – Increases current while keeping voltage constant, ensuring stable energy output.
Use weatherproof MC4 connectors to maintain safety and efficiency.
Step 5: Connecting the Charge Controller and Battery
Connect the solar panel’s output to the charge controller’s input.
Connect the charge controller’s output to the solar battery charger or directly to the solar battery.
If using multiple batteries, wire them in series (higher voltage) or parallel (higher capacity) depending on your energy needs.
A charge controller prevents batteries from overcharging or discharging too quickly, extending their lifespan.
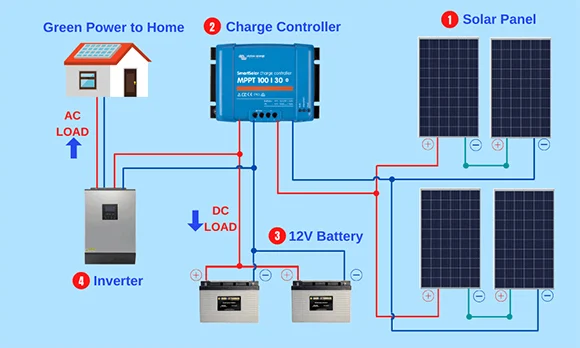
Step 6: Installing the Inverter
- Attach the solar and power inverter to the battery’s positive and negative terminals.
- Make sure the inverter’s AC output is suitable for your household appliances.
- Install fuses and breakers to protect your system against electrical faults.
From this point, your solar system is prepared to start using packed energy for your home!
Step 7: Services and Maintenance
Check voltage readings on the charge controller to ensure the system is working correctly.
Monitor battery performance by observing charge and discharge cycles.
Inspect wiring connections for any loose or frayed cables that may reduce efficiency.
Clean solar panels regularly to remove dust, dirt, or bird droppings that may block sunlight.
Consider smart monitoring systems that provide real-time energy usage and solar power generation data.
For added convenience, enhance your outdoor spaces with solar fence lights or solar street lights for security and illumination.
RELATED POSTS
- The Best Solar Panels of 2026
- Best Solar Panels for Cloudy Weather
- Off-Grid Solar System: How It Works
- Off-Grid Solar System Cost & Setup
- Best Solar Inverters for Home Use
- Is Solar Worth It in 2026
- Do Solar Panels Increase Home Value in 2026
FAQs
1. How does the installation of solar panels work?
Yes, but it should be done by someone familiar with local electrical codes and safety guidelines. DIY installation is perfect for off-grid solar power systems, but will likely need a professional if grid-tied.
2. How much do DIY solar panels cost?
The cost of 5KW DIY Solar panel System is anywhere between 5,000 – 10,000, depending on the panels and batteries you used.
3. Do Permits often required to install solar panels?
Permits are typically unneeded for off-grid solar energy systems. But grid-tied systems might have local regulations (although very few).
4. How long do solar panels last?
With little maintenance needed most solar panels have a life span of 25–30 years.
5. Can solar power supply all electricity needs for my house?
For example, the correct size of the solar system with solar/battery backup will run your house fully off-grid (one train car).
To Wrap Up
Getting started with solar power doesn’t have to be complicated. Once you understand the basics—how solar energy is created, what each component does, and how the system comes together—the whole process becomes much clearer.
Whether you’re planning a small starter setup or thinking about a full off-grid system, the key is to take it step by step and choose equipment that matches your real energy needs.
Solar power is not just about saving money on electricity. It’s also about gaining more control over your energy use and building a more independent home setup over time.
If you’re serious about going solar, start with the basics first, plan your system properly, and build from there as your needs grow.
Author
John Tanko is the founder of Top Solar Picks and a solar energy researcher whose work has been featured in leading technology and sustainability publications. Learn more on our About page.